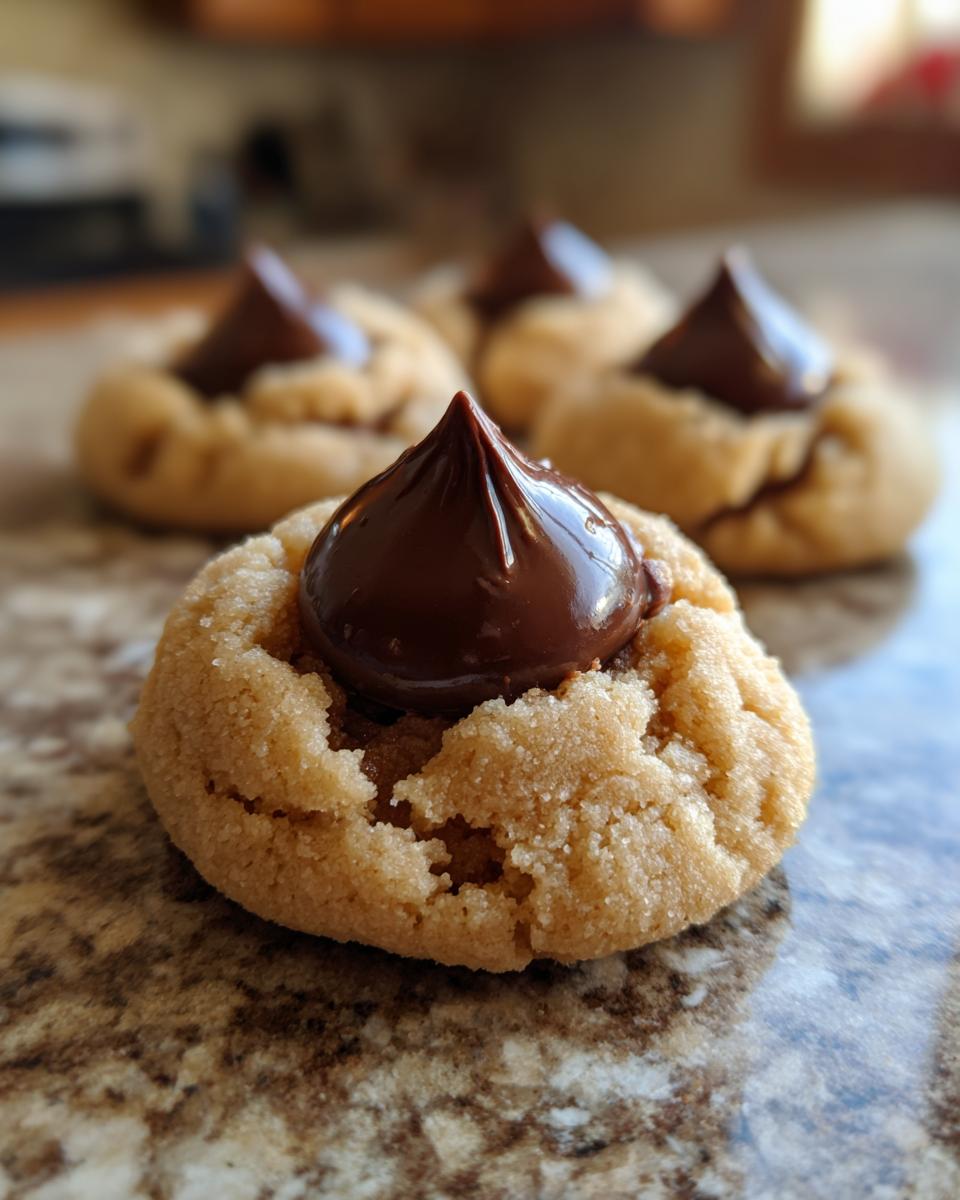
Oh, the holiday season! It just wouldn’t be the same without the scent of warm cookies wafting through the house. And when it comes to my absolute favorite Christmas baking tradition, these Santa’s Favorite Peanut Butter Blossoms are the undisputed champions! There’s something so magical about that classic peanut butter cookie hug around a melty Hershey’s Kiss, isn’t there? It’s pure, simple joy baked into every bite, and honestly, Santa looks forward to them just as much as my family does!
Why You’ll Love Santa’s Favorite Peanut Butter Blossoms
Trust me, these cookies are a winner for so many reasons:
-
Super Easy! Seriously, even if you’re new to baking, you can totally nail these. They use simple ingredients and come together in a flash.
-
Classic Comfort! That rich peanut butter taste combined with the sweet chocolate kiss is like a cozy hug in cookie form. It’s a flavor everyone adores.
-
Festive Fun! They look SO cute with that classic Hershey’s Kiss right in the middle. Perfect for any holiday platter or cookie exchange. Check out these easy Christmas cookies too!
-
Crowd-Pleaser! Whether it’s for family, friends, or maybe even the big guy himself, these cookies are always a hit. Everyone always asks for the recipe!
Gather Your Ingredients for Santa’s Favorite Peanut Butter Blossoms
Okay, so let’s get ready to whip up these little beauties! You don’t need anything fancy, just a few pantry staples and of course, those iconic Hershey’s Kisses. Here’s what you’ll want to have on hand:
- 2 1/4 cups all-purpose flour
- 1 teaspoon baking soda
- 1/2 teaspoon salt
- 1 cup (that’s two sticks!) unsalted butter, make sure it’s nice and softened
- 1 cup creamy peanut butter (you can totally use crunchy if that’s your jam, too!)
- 3/4 cup granulated sugar
- 3/4 cup packed brown sugar – the packed kind adds such a lovely depth!
- 2 large eggs
- 1 teaspoon vanilla extract
- And the star of the show: 1 (10.5 ounce) package of Hershey’s Kisses. Unwrapping these is part of the fun!
Step-by-Step Guide to Making Santa’s Favorite Peanut Butter Blossoms
Alright, let’s get down to business and make some magic happen! This part is where it all comes together, and trust me, it’s easier than you think. Grab your apron, and let’s do this!
Preparing the Dough
First things first, get that oven preheating to 375°F (190°C). While it’s warming up, whisk together your flour, baking soda, and salt in a small bowl. In a separate, bigger bowl, it’s time to cream the softened butter, peanut butter, and both sugars until they’re light and fluffy. Oh, and don’t forget to beat in those two eggs one by one, followed by a splash of vanilla extract. Now, gradually add your dry ingredients to the creamy mixture. Mix it up until it’s just combined – you don’t want to overdo it!
Baking and Kiss Placement
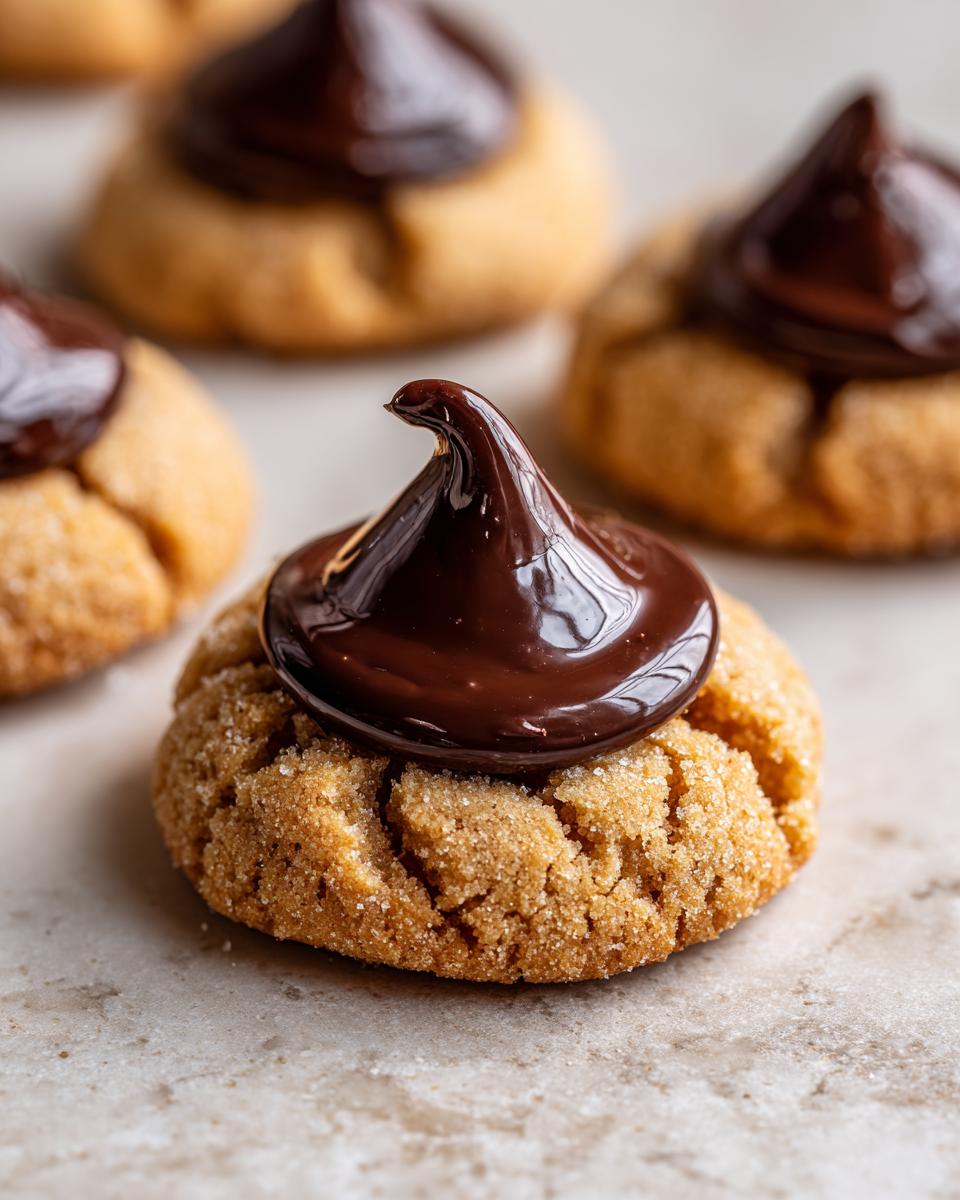
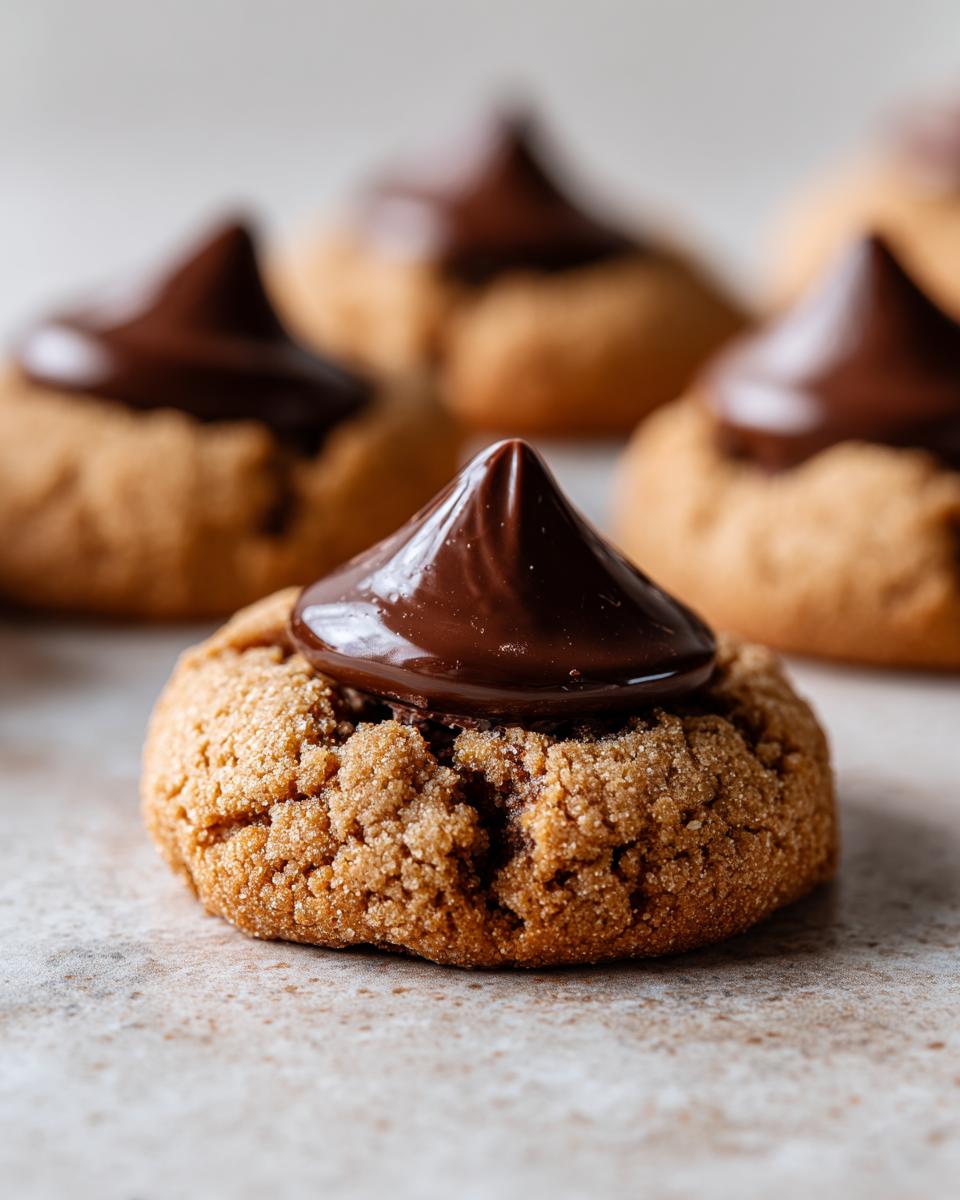
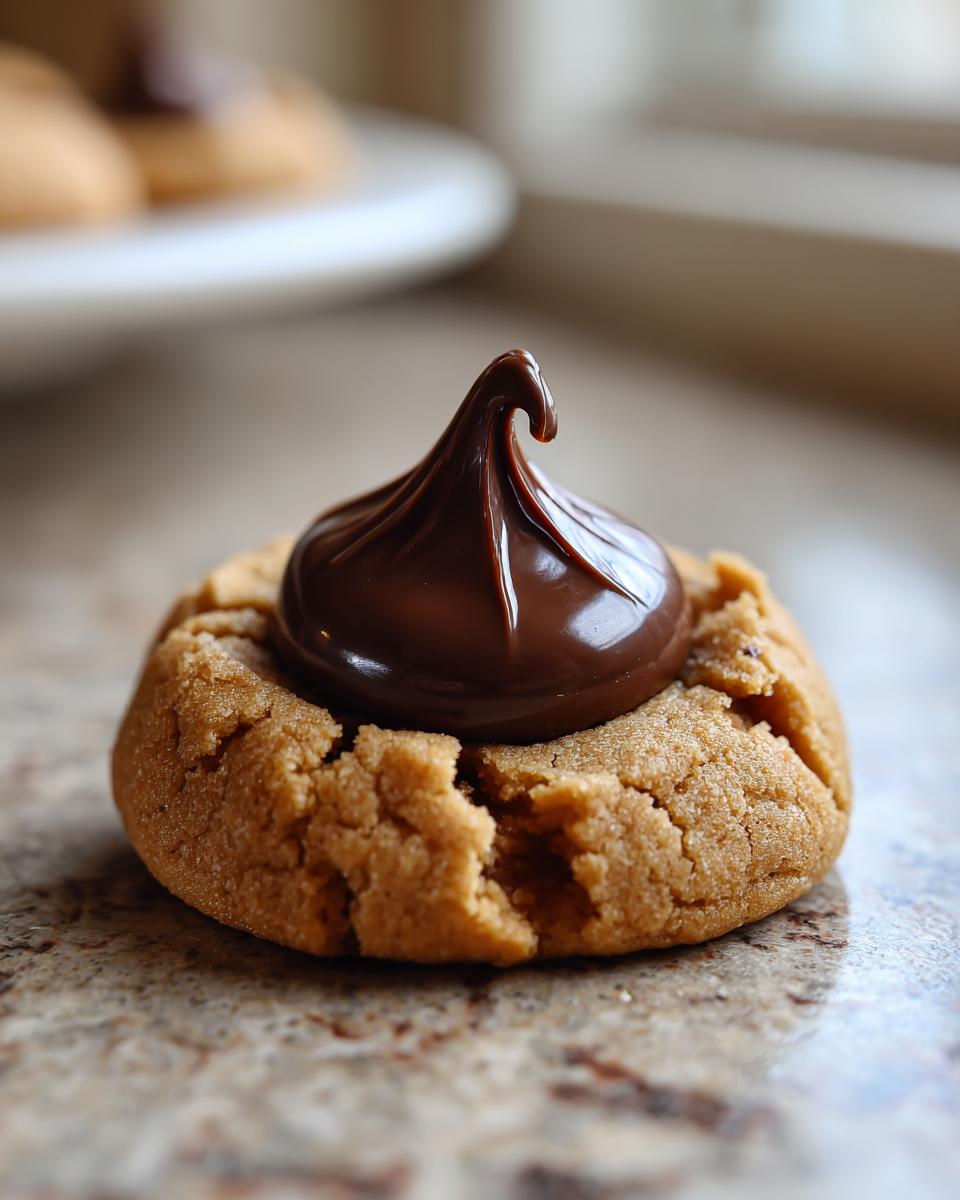
Now comes the fun bit after mixing! Roll that lovely dough into 1-inch balls. I like to use a small cookie scoop to make them all the same size – it really helps with even baking. Place them on ungreased baking sheets, giving them a little space to spread out. Pop them into the oven for about 9 to 11 minutes. You’re looking for the edges to be just lightly golden. As SOON as they come out of the oven, while they’re still nice and warm, gently press one unwrapped Hershey’s Kiss right into the center of each cookie. The residual heat will melt it down perfectly!
Cooling and Finishing Touches
This part is super important for that perfect cookie texture! Let the cookies hang out on the baking sheets for a few minutes after you’ve added the Kisses. This lets them set up just a bit. Then, carefully transfer them to a wire rack to cool completely. Resist the urge to try one right away – I know it’s hard! Letting them cool properly makes sure they don’t fall apart and that delicious chocolate top stays put. These cookies smell amazing cooling, perfect for getting you in the mood if you’re planning on Christmas morning treats!
Tips for Perfect Santa’s Favorite Peanut Butter Blossoms
You know, getting these cookies just right is all about a few little tricks I’ve picked up over the years. It’s not hard at all, but these tips really make a difference! First off, make sure your butter and peanut butter are at room temperature. It makes creaming them with the sugars SO much easier and results in a smoother dough. Don’t chill the dough too much before you roll it, either – a slightly soft dough makes that Kiss press a breeze. If your Kisses seem to be melting too much *before* you press them in, try popping the cookies in the fridge for just 5 minutes after baking before adding them. It’s like magic! And hey, if you love peanut butter, you’ve *got* to check out these peanut butter brownies, and these 3-ingredient Christmas cookies are another holiday lifesaver!
Storage and Make-Ahead for Your Santa’s Favorite Peanut Butter Blossoms
Want to get a head start on the holiday baking? You totally can with these amazing cookies! You can bake them a day or two ahead and store them in an airtight container at room temperature. Seriously, they stay wonderfully fresh. If you want to prep even further ahead, you can bake them and freeze them *without* the Kisses, then add the Kisses after thawing. Or, freeze the dough balls, and bake them straight from frozen (just add a couple of extra minutes to the baking time!). They’re super forgiving!
Frequently Asked Questions About Santa’s Favorite Peanut Butter Blossoms
Got questions about these classic cookies? I’ve got answers! It’s always good to know the little tricks to make sure Santa himself is impressed!
Can I use chunky peanut butter?
Absolutely! Using chunky peanut butter will give your cookies a bit more texture with peanut butter bits throughout. It’s a delicious variation, though the Kiss might sit a little higher!
What if my Hershey’s Kisses melt too much?
Don’t worry if your Kisses melt a bit too much! It happens, especially if your cookies are extra hot. Try pressing them in just as the cookies come out, or let the cookies cool for just 30 seconds before adding the Kiss. It’s all about that sweet spot!
How long do these cookies stay fresh?
These Christmas cookies are surprisingly good at staying fresh! Store them in an airtight container at room temperature, and they should be delicious for up to 3-4 days. Perfect for having treats ready all week!
Nutritional Information
Just a friendly heads-up, these yummy numbers are estimates, and will vary depending on the exact ingredients you use, especially the peanut butter and Kisses. But generally, you’re looking at about 150 calories per cookie, with around 8g of fat, 17g of carbs, and a good dose of sugar to give you that holiday energy boost!
Share Your Santa’s Favorite Peanut Butter Blossoms Creations!
I just LOVE seeing your baking adventures! Have you made these Santa’s Favorite Peanut Butter Blossoms yet? Or perhaps you’ve tried them alongside making a DIY Christmas Advent Calendar? I’d be thrilled if you’d leave a comment below with your experience, rate the recipe, or share a photo of your beautiful cookies. Seeing them makes my day, almost as much as Santa enjoying them!
Print
Santa’s Favorite Peanut Butter Blossoms
- Total Time: 30 min
- Yield: 36 cookies
- Diet: Vegetarian
Description
Classic peanut butter cookies topped with a Hershey’s Kiss.
Ingredients
- 2 1/4 cups all-purpose flour
- 1 teaspoon baking soda
- 1/2 teaspoon salt
- 1 cup (2 sticks) unsalted butter, softened
- 1 cup creamy peanut butter
- 3/4 cup granulated sugar
- 3/4 cup packed brown sugar
- 2 large eggs
- 1 teaspoon vanilla extract
- 1 (10.5 ounce) package Hershey’s Kisses
Instructions
- Preheat your oven to 375 degrees F (190 degrees C).
- In a small bowl, whisk together the flour, baking soda, and salt.
- In a large bowl, cream together the softened butter, peanut butter, granulated sugar, and brown sugar until light and fluffy.
- Beat in the eggs one at a time, then stir in the vanilla extract.
- Gradually add the dry ingredients to the wet ingredients, mixing until just combined.
- Roll the dough into 1-inch balls.
- Place the balls onto ungreased baking sheets.
- Bake for 9 to 11 minutes, or until the edges are lightly golden.
- Immediately after removing from the oven, press one Hershey’s Kiss into the center of each cookie.
- Let the cookies cool on the baking sheets for a few minutes before transferring them to a wire rack to cool completely.
Notes
- You can use chunky peanut butter if you prefer.
- For a festive touch, use holiday-themed Hershey’s Kisses.
- Store cookies in an airtight container at room temperature.
- Prep Time: 20 min
- Cook Time: 10 min
- Category: Dessert
- Method: Baking
- Cuisine: American