There’s just something so special about a homemade gift, don’t you think? It feels like you’re giving a little piece of your heart. That’s why I absolutely adore making a Giftable: Cookie Mix in a Jar (with Free Printable!). It’s not only gorgeous to look at, all those pretty layers peeking through the glass, but it also means the lucky recipient gets to have a fun baking project *and* delicious cookies to enjoy. I still remember the first time I received one – it felt like I’d won the lottery! It’s the perfect blend of thoughtfulness and practicality, and trust me, all my friends rave about them.
Why This Giftable: Cookie Mix in a Jar is a Perfect Choice
Honestly, why wouldn’t you make this? It’s seriously the easiest AND prettiest gift. Here’s why everyone loves them:
- Super Easy: Takes hardly any time to put layers together.
- Looks Amazing: Those colorful ingredients stacked up? Chef’s kiss!
- So Thoughtful: It screams ‘I made this for YOU!’
- Fun Activity: The recipient gets to bake fresh cookies!
It’s a win-win-win, really!
Gathering Your Ingredients for Giftable: Cookie Mix in a Jar
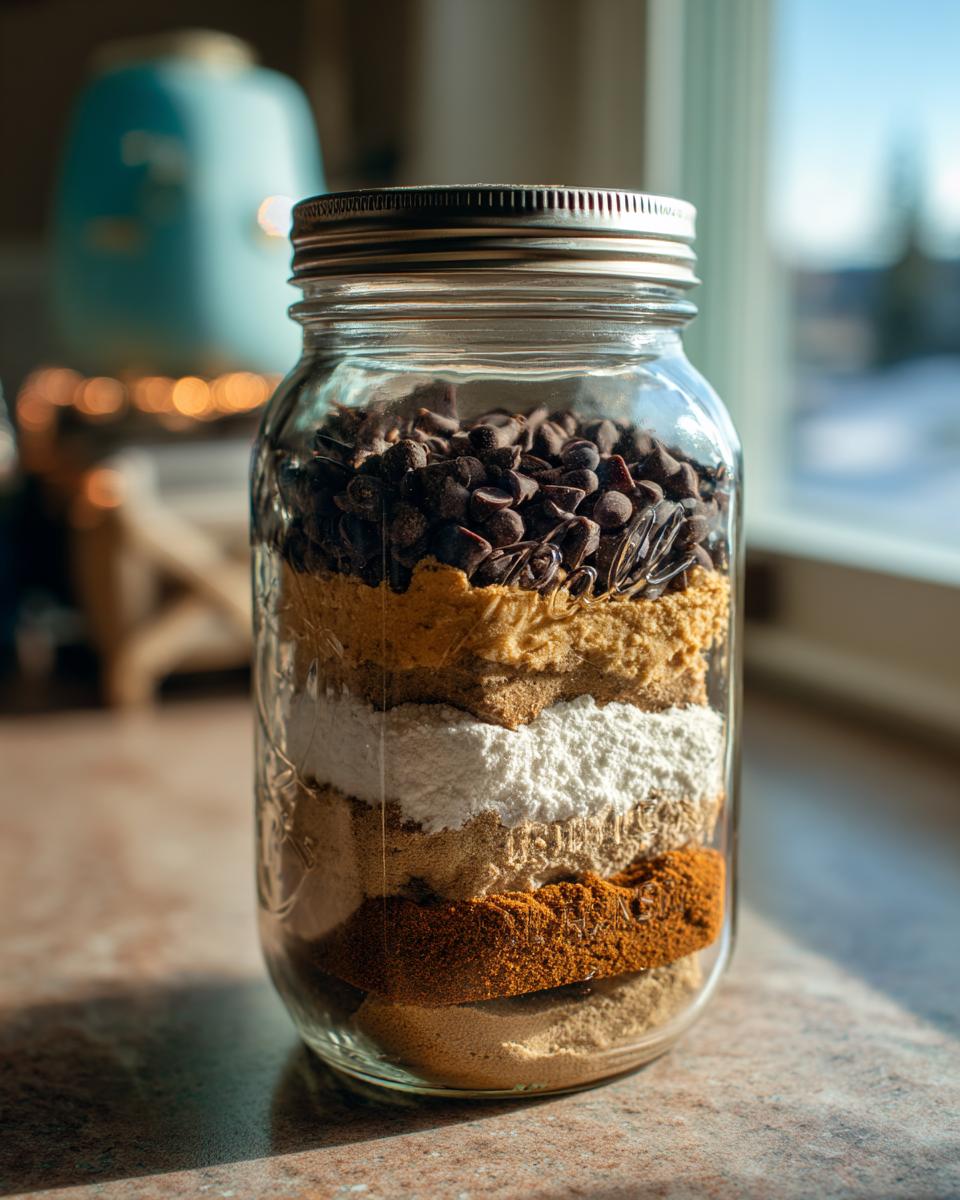
Alright, let’s talk about what you’ll need to make this magical cookie mix in a jar. The beauty of this recipe is how simple it is; all the magic happens from dry ingredients layered perfectly. For the best results, I always recommend using good quality ingredients – it really does make a difference! For the jar itself, a wide-mouth quart-sized mason jar is my absolute go-to. It makes layering a breeze and gives the recipient plenty of room to dump everything out later. It’s honestly the best canvas for our Giftable: Cookie Mix in a Jar!
Essential Dry Ingredients
This is where the cookie magic starts! Make sure your flour, baking soda, and salt are fresh – give them a sniff! You’ll need: 1 and 1/2 cups of all-purpose flour, 1 teaspoon of baking soda, and half a teaspoon of salt. Whisk these together really well in a separate bowl first. This step is super important to make sure the leavening agents are evenly distributed, so you don’t end up with one flat cookie and one super puffed-up one!
Optional Add-ins for Your Cookie Mix Jar
Now for the fun part – customizing! While classic chocolate chips are amazing, why not add a little extra pizzazz? Think crunchy chopped walnuts or pecans, a handful of colorful sprinkles for a festive touch, or even a mix of white chocolate chips with the semi-sweet. If you add nuts, just make sure they’re chopped not too finely. They layer beautifully right on top of the chocolate chips to keep them protected.
Step-by-Step Guide to Creating Your Giftable: Cookie Mix in a Jar
Okay, now for the really fun part – building those gorgeous layers in your jar for this Giftable: Cookie Mix in a Jar! It’s seriously like building a little edible art project. First things first, make sure your jar is squeaky clean and totally dry. Any moisture can make things clump up, and we don’t want that! Grab your whisked dry ingredients and your jar. Trust me, clear, defined layers make it look extra special. It’s all about taking your time and making it pretty! Remember, you’ll want to attach a tag with the baking instructions soon, and you can find tons of ideas for handmade gift tags to make it extra personal.
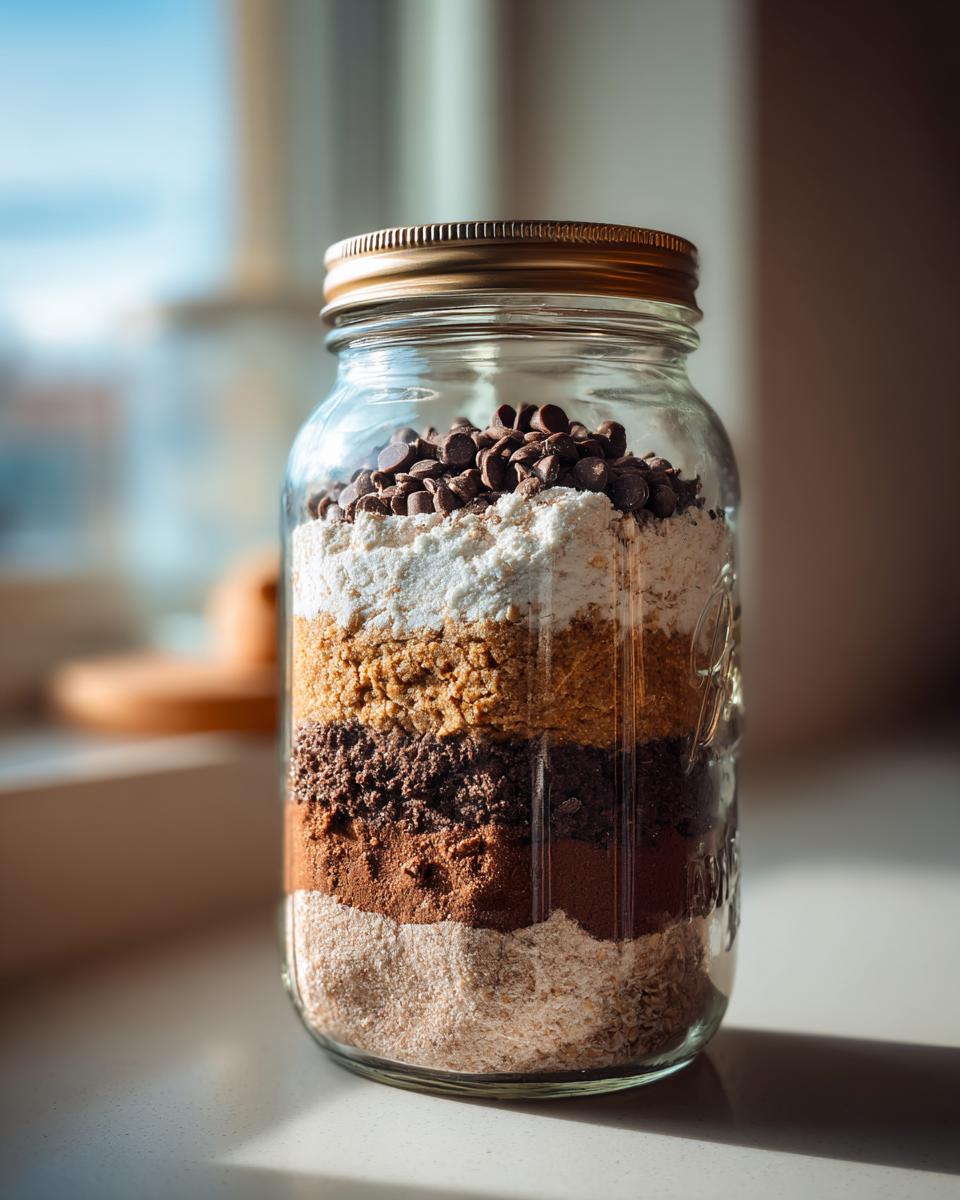
Layering the Dry Ingredients
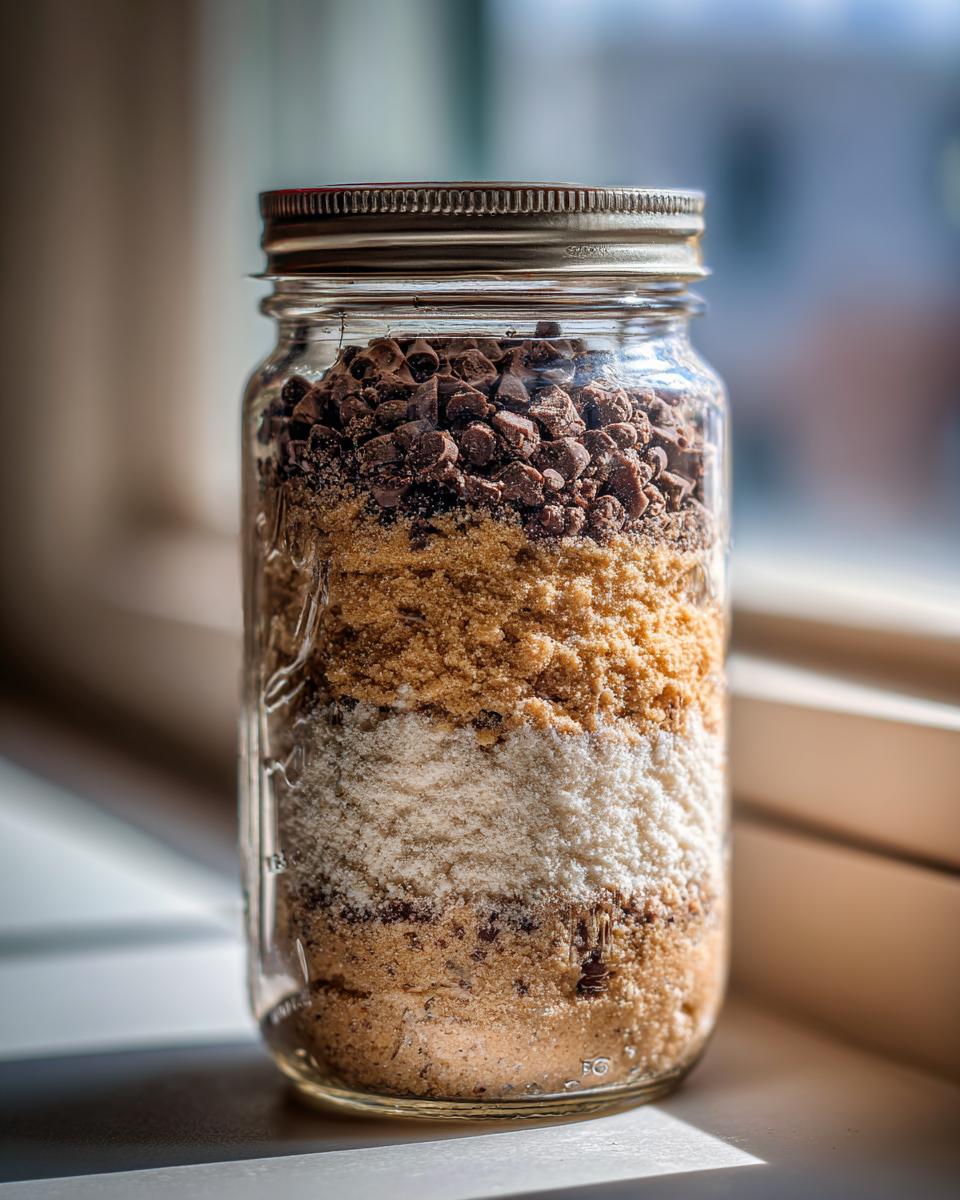
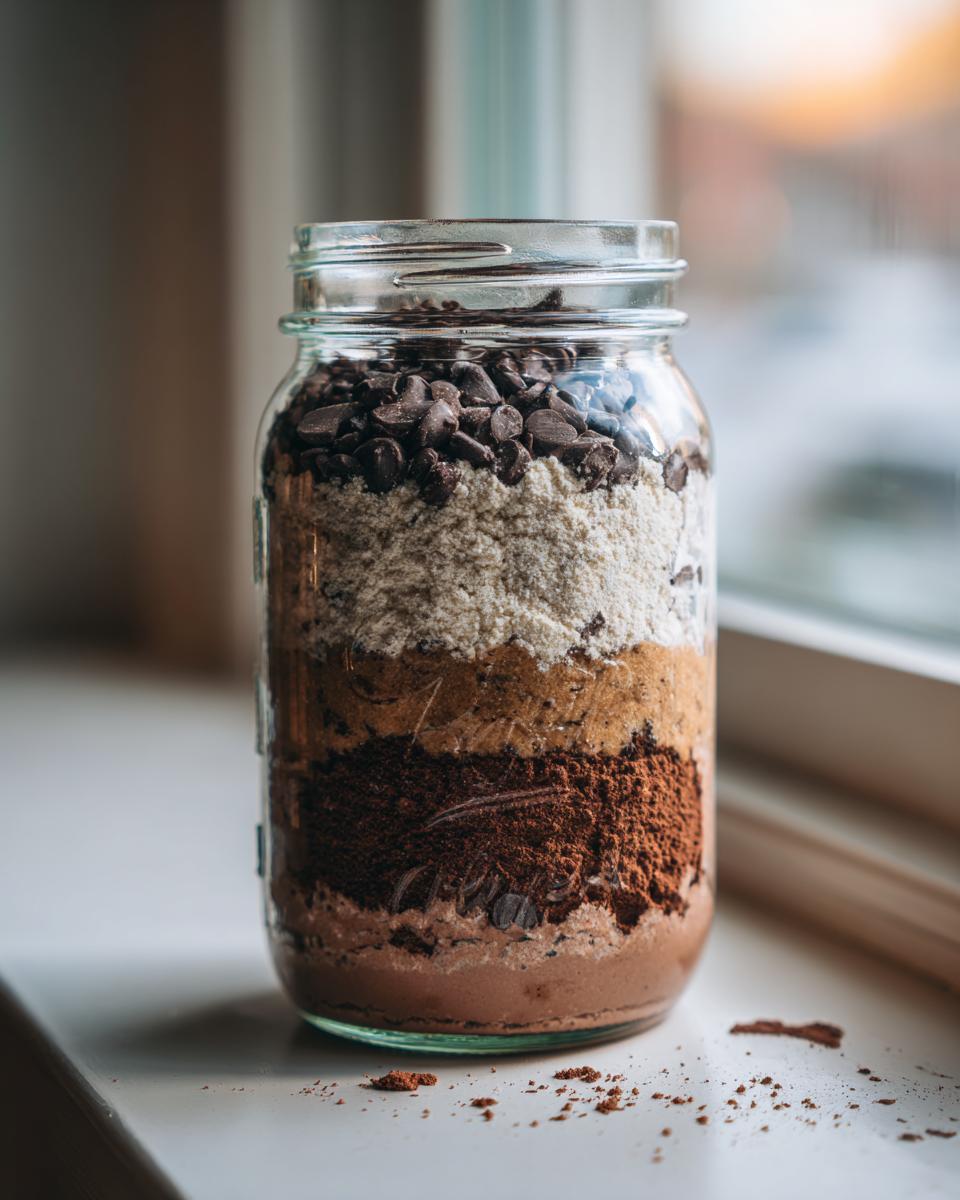
So, we’ve got our flour, baking soda, and salt all whisked together. Now, carefully pour this mixture into the bottom of your clean jar. If you have a funnel, now’s the time to use it – it makes things SO much neater! Gently tap the bottom of the jar on your counter a couple of times to settle the layer. Next, we’ll add the sugars. Pour the granulated sugar evenly over the flour mixture, then carefully add the packed brown sugar on top of that. Again, a little tap to settle each layer works wonders.
Adding the Chocolate Chips and Sealing
The grand finale! Top all those lovely dry layers with your chocolate chips – or whatever fun add-ins you chose. Don’t fill the jar right to the brim; leave a little space at the top. This makes it easier for the baker to dump everything out later. Pop on the lid and screw it tight! A good, snug seal keeps everything fresh and stops those layers from getting mixed up during transport. You’re almost done!
Baking Instructions for Your Giftable: Cookie Mix in a Jar
Now, for the part your lucky recipient will love – actually baking these yummy cookies! You’ll want to attach a little tag with these instructions, or a print-out that looks super cute. Here’s what they’ll need to do: Empty the whole jar into a big mixing bowl. Then, add in one large egg, about half a cup of melted butter (I like unsalted best!), and a teaspoon of pure vanilla extract. Mix it all up with a spoon or your hands until it’s *just* combined – seriously, don’t overmix it! That’s the secret to tender cookies. Drop spoonfuls onto a baking sheet lined with parchment paper (makes cleanup a breeze!) and bake at 375°F (190°C) for about 9 to 11 minutes. They should be golden around the edges. For more easy baking ideas, check out these easy 3-ingredient Christmas cookies!
Personalizing Your Giftable: Cookie Mix in a Jar
Okay, now that you’ve got your beautiful layers all stacked up and sealed, it’s time to make your Giftable: Cookie Mix in a Jar truly shine! This is where you can really let your personality bloom and make it extra special for whoever’s going to receive it. Think of it as the final flourish that takes it from homemade to *handmade with love*! A little bit of ribbon, a pretty fabric topper, or a cute label can make all the difference. It shows you really put thought and care into it, and who doesn’t love that? You can even check out some fun ideas for DIY Christmas advent calendars or DIY snow globe jars for extra inspiration on making your gift packaging pop!
Frequently Asked Questions About Giftable: Cookie Mix in a Jar
Got questions about whipping up this super cute Giftable: Cookie Mix in a Jar? I’ve got you covered! It’s such a popular gift because it’s so easy, but a few little tips never hurt. Let’s dive into what folks usually ask!
What size jar is best for this cookie mix?
My all-time favorite is a quart-sized mason jar, the wide-mouth kind! It gives you plenty of room to create those pretty, distinct layers without things getting all smooshed together. Plus, it’s super easy for the baker to dump everything out later.
How long does the cookie mix stay fresh?
As long as the jar is sealed nice and tight, the dry ingredients will stay fresh for about 3 to 6 months. Just make sure it’s stored in a cool, dry place. Honestly, though, they usually get baked up way before that!
Can I add other ingredients to the jar?
Absolutely! Get creative! You can layer in chopped nuts, a handful of colorful sprinkles, or even some mini M&Ms right on top of the chocolate chips. Just make sure they’re dry ingredients that won’t spoil before baking.
Estimated Nutritional Information
Just so you know, the nutritional info is an guesstimate, since brands and those extra yummy add-ins can change things up! Based on the recipe, one cookie (after baking, of course!) is roughly around 150 calories, with about 8g of fat, 18g of carbs, and 15g of sugar. It’s a sweet treat, for sure!
Print
Cookie Mix in a Jar
- Total Time: 20 min
- Yield: 1 jar (approx. 12-18 cookies)
- Diet: Vegetarian
Description
A simple cookie mix recipe layered in a jar, perfect for gifting.
Ingredients
- 1 1/2 cups all-purpose flour
- 1 teaspoon baking soda
- 1/2 teaspoon salt
- 3/4 cup granulated sugar
- 3/4 cup packed brown sugar
- 1 cup chocolate chips
Instructions
- In a bowl, whisk together flour, baking soda, and salt.
- Pour the flour mixture into the bottom of a clean jar.
- Add the granulated sugar over the flour layer.
- Add the brown sugar over the granulated sugar layer.
- Top with the chocolate chips.
- Seal the jar tightly.
- Attach a tag with baking instructions: “Empty jar contents into a bowl. Add 1 egg, 1/2 cup melted butter, and 1 teaspoon vanilla extract. Mix until just combined. Drop spoonfuls onto a baking sheet and bake at 375°F (190°C) for 9-11 minutes.”
Notes
- Use a wide-mouth mason jar for easy layering and access.
- Decorate the jar with ribbon or fabric for a finished look.
- Consider adding other mix-ins like nuts or sprinkles.
- Prep Time: 10 min
- Cook Time: 10 min
- Category: Dessert
- Method: Baking
- Cuisine: American