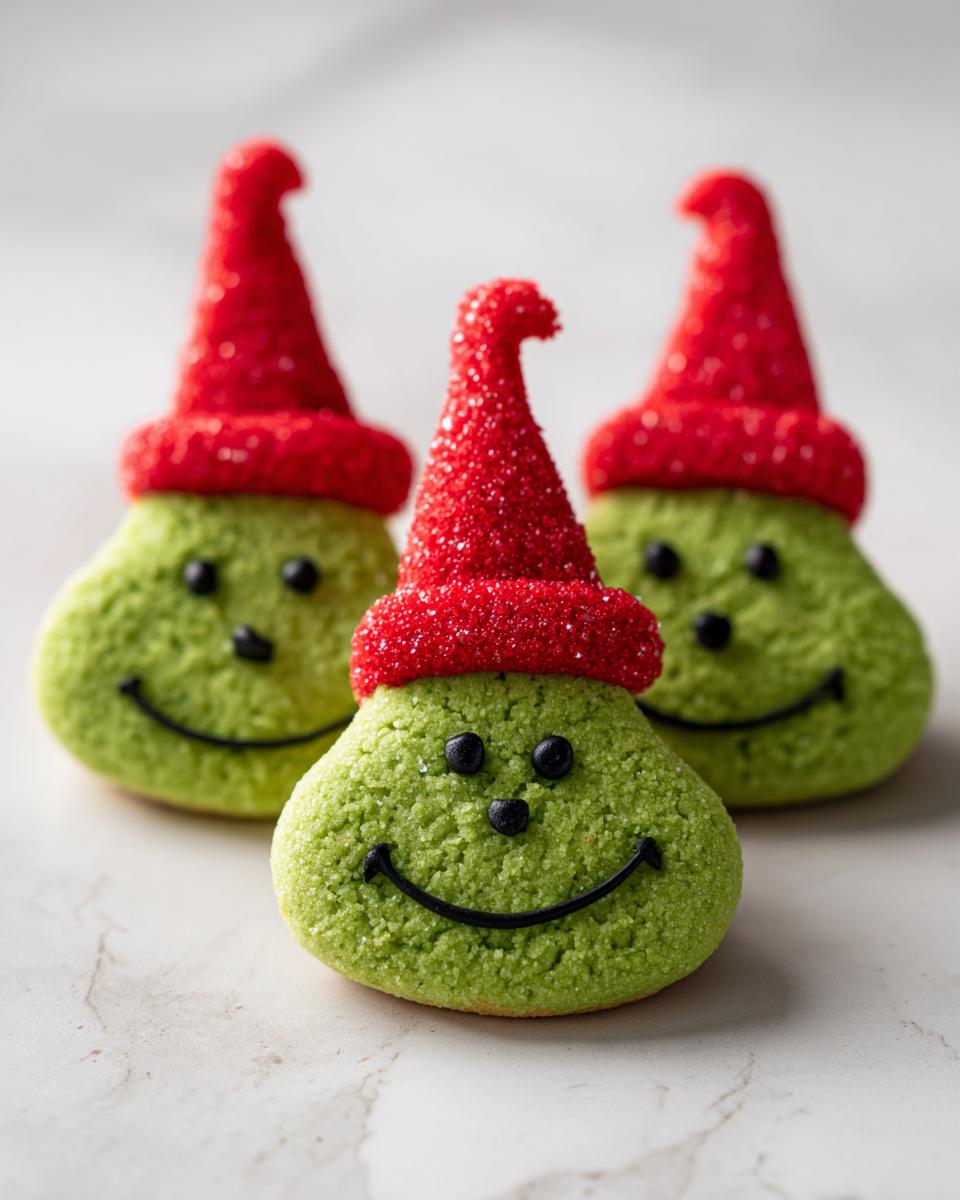
Oh, the holidays! Is there anything more magical than the smell of cookies baking and the excitement of Whoville coming to life? I swear, my heart just melts a little thinking about it. My absolute favorite part of the season is sneaking these adorable Grinch cookies into my baking rotation. Seriously, they’re just too cute and ridiculously fun to make! I remember the first time I whipped up a batch for my nephew, his eyes lit up like the town Christmas tree. These aren’t just any cookies; they’re a little slice of holiday cheer, straight from the heart of Mount Crumpit (minus the sour attitude, of course!).
Why You’ll Love These Grinch Cookies
Honestly, you’re going to adore making and eating these Grinch cookies. Why? Well, let me tell you!
- Super Easy to Make: Even if you’re not a master baker, these cookies are totally foolproof. The dough comes together like a dream!
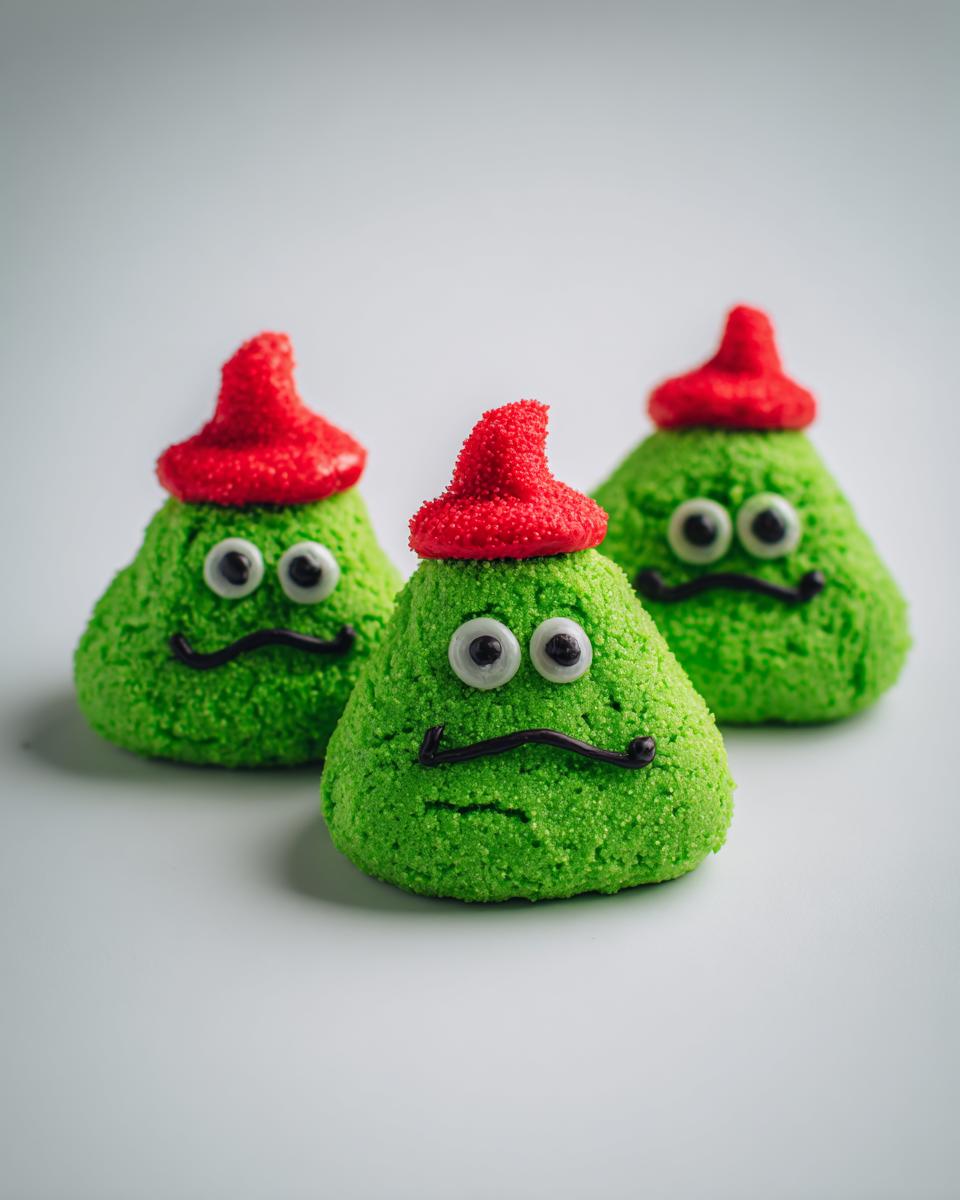
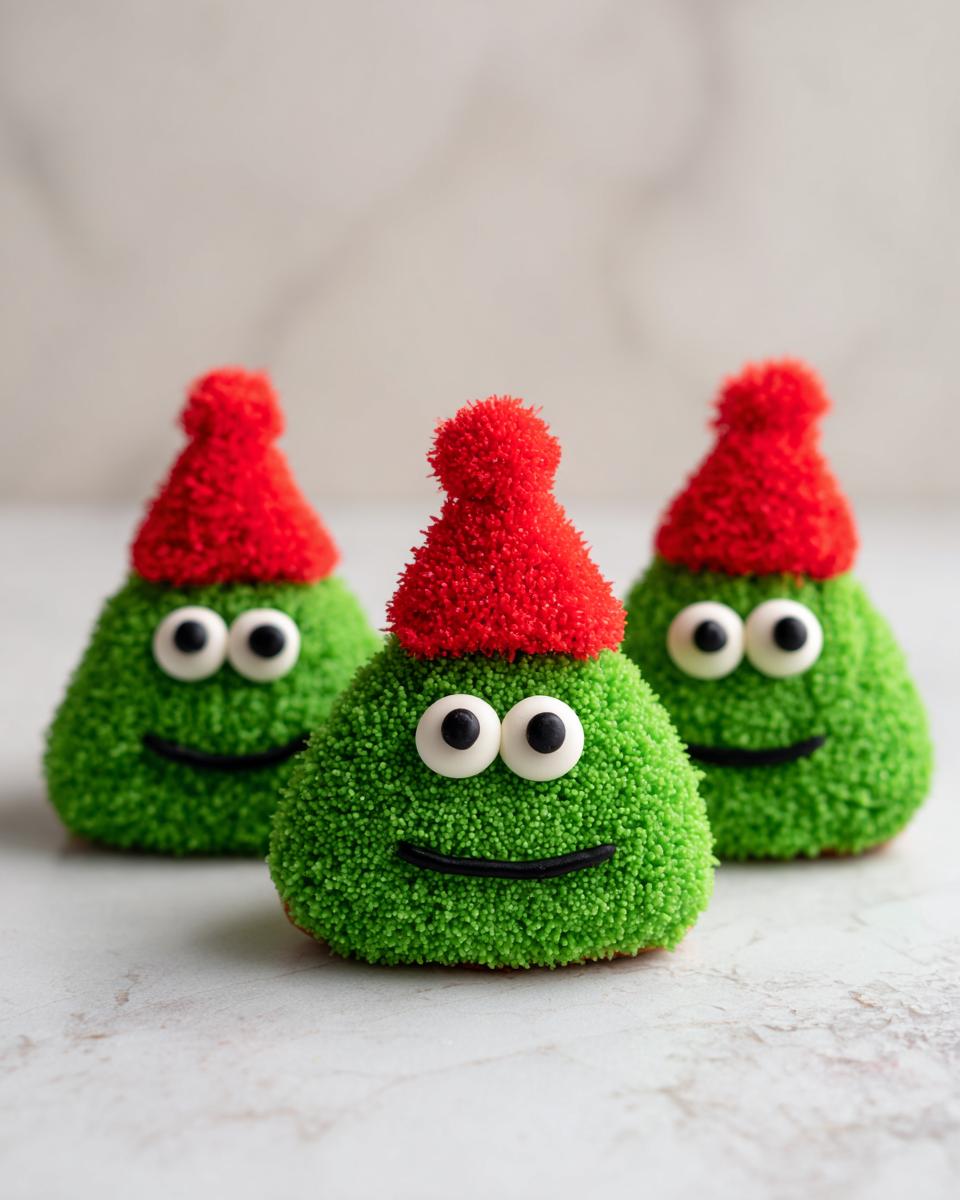
- Festive & Fun to Look At: With their bright green color and little red hats, they scream holiday spirit. They’re guaranteed to bring a smile to everyone’s face.
- Absolutely Delicious: Beyond the cute factor, they taste amazing! Think soft, chewy cookies with a hint of vanilla – pure bliss.
- Perfect for Sharing: Whether it’s for a cookie exchange, a classroom party, or just a cozy afternoon with the family, these cookies are a huge hit!
Gather Your Ingredients for Grinch Cookies
Alright bakers, let’s get our Grinch on! To whip up these darling Grinch Cookies, you’ll want to round up these goodies. Don’t worry, they’re all pretty standard pantry staples, which is one of the things I love most about them!
- 2 1/4 cups all-purpose flour – this is the base of our cookie!
- 1 teaspoon baking soda – makes them nice and tender.
- 1/2 teaspoon salt – just to balance everything out.
- 1 cup (that’s two sticks!) unsalted butter, make sure it’s softened – this is key for creaming!
- 3/4 cup granulated sugar – for sweetness.
- 3/4 cup packed light brown sugar – adds a lovely moisture and depth.
- 2 large eggs – at room temperature is best!
- 1 teaspoon vanilla extract – because, well, vanilla makes everything better.
- 1/4 cup milk – brings it all together.
- Green food coloring – for that signature Grinchy hue! Gel works best for vibrant color.
- Red candy melts – for their adorable little hats.
- Black edible marker – to draw on those mischievous eyes and mouth.
Essential Equipment for Baking Grinch Cookies
Okay, so to make these super fun Grinch Cookies, you won’t need anything too fancy. Just your trusty kitchen basics!
- Mixing Bowls: You’ll need a couple – a big one for creaming the butter and sugar, and a medium one for your dry ingredients.
- Electric Mixer: A stand mixer or a hand mixer makes creaming the butter and sugars a breeze. If you’re feeling brave, you can totally do it by hand!
- Whisk: For getting those dry ingredients all nicely combined.
- Measuring Cups and Spoons: Accuracy is your friend here!
- Baking Sheets: Grab a few so you can bake batches efficiently. Those holiday baking days go faster when you can bake more at once!
- Wire Cooling Racks: Essential for letting the cookies cool down properly.
- Spatula: For scraping down bowls and gently mixing the dough.
- Small Bowls: Handy for holding your divided dough and candy melts.
- Edible Black Marker: This is your key tool for drawing on those Grinchy faces later!
Step-by-Step Guide to Making Grinch Cookies
Alright, deep breaths, everyone! This is where the magic really happens. Making these Grinch Cookies is honestly so much fun, and following these steps will make sure they turn out perfectly adorable (and delicious!). Trust me, it’s easier than you think!
Preparing the Cookie Dough
First things first, get your oven preheated to 375°F (190°C). While that’s warming up, whisk together your flour, baking soda, and salt in a medium bowl. Set that aside. In a big bowl, cream your softened butter with both the granulated and brown sugars until it’s nice and fluffy – this is super important for texture! Beat in those eggs one at a time, then stir in the vanilla. Now, the trick to a good cookie: gradually add the dry ingredients to the wet, alternating with the milk. Start and end with the dry stuff. Mix it until it’s *just* combined; don’t overdo it! Then, split that glorious dough right down the middle. Tint one half with your green food coloring – get it nice and vibrant!
Shaping and Adding the Grinch’s Hat
Now for the fun part! Take that beautiful green dough and roll it into small balls. I like to flatten them just a bit so the hat has a nice base. Then, take your red candy melts (make sure they’re softened a bit, usually by melting them according to package directions – I usually do this in short bursts in the microwave) and press a small blob onto one side of each green cookie. This is going to be our Grinch’s signature red hat!
Baking and Cooling Your Grinch Cookies
Carefully place your shaped cookies onto your prepared baking sheets. Pop them into that preheated oven and bake for about 8 to 10 minutes. You’re looking for the edges to be just lightly golden. They’ll firm up more as they cool. The hardest part? Letting them cool on the baking sheets for a few minutes before you gently move them to wire racks to cool completely. Seriously, don’t rush this cooling step – warm cookies are just too delicate to handle decorations!
Adding the Finishing Touches
Once your Grinch cookies are totally cool, it’s time for the personality! Grab your black edible marker. This is where you draw on those cheeky eyes and that mischievous little Grinch mouth. Take your time, and don’t worry if they aren’t perfectly symmetrical – that just adds to their charm, right? You can even add a tiny dot of white frosting for the eye’s pupil if you want that extra pop!

Looking for more fun holiday baking ideas? Check out these easy 3-ingredient Christmas cookies!
Tips for Perfect Grinch Cookies
You’re so close to Grinchy cookie perfection! Here are a few little tricks I’ve picked up over the years that make these Grinch cookies turn out extra special every single time. It’s all about those little details, you know?
- Butter Temperature is Key: When it says ‘softened butter,’ really mean it! It should be soft enough to easily indent with your finger, but NOT melty or greasy. Too cold, and your dough won’t cream properly; too warm, and your cookies might spread too much.
- Don’t Overmix the Dough: Seriously, mix until *just* combined when you add the dry ingredients. Overmixing develops the gluten in the flour, which can make your cookies tough instead of deliciously tender. A few streaks of flour are totally fine!
- Gel Food Coloring for the Win: If you can, use gel food coloring for that vibrant Grinch green! A little goes a long way, and it won’t thin out your dough like liquid coloring can.
- Candy Melt Magic: Make sure those red candy melts are smooth and slightly cooled before pressing them onto the cookies. If they’re too hot, they’ll melt into the green dough. If they’re too cool, they won’t stick as well. Test a tiny bit on a plain piece of parchment paper first if you’re unsure!
- Edible Marker Patience: Give those cookies plenty of time to cool completely before you start drawing. Even a little warmth can make the marker smudge, and you want those crisp Grinchy lines!
Follow these tips, and your Grinch cookies will be the talk of Whoville! For more festive fun, check out these adorable Christmas tree cupcakes for kids!
Ingredient Substitutions and Notes
Sometimes you need a little wiggle room in the kitchen, right? That’s totally okay with these Grinch Cookies! If you’re out of something or have dietary needs, here are a few ideas.
Butter: If you need to make these dairy-free, a good vegan butter substitute works wonderfully. Just make sure it’s the block kind, not the spreadable tub stuff, for the best results.
Eggs: For an egg-free version, a flax egg (1 tablespoon ground flaxseed + 3 tablespoons water, let sit for 5 minutes) can work, though the texture might be a *tiny* bit different.
Red Candy Melts: No candy melts? No problem! You can use red-tinted buttercream or even a bit of strawberry jam for the hat, though it might not set quite as firmly.
Edible Marker: If you don’t have one, you could try a tiny dab of carefully colored royal icing for the eyes and mouth, but the marker is definitely the easiest!
Serving and Storing Your Grinch Cookies
These adorable Grinch Cookies are just begging to be shared! They’re fantastic on their own with a glass of milk, but imagine them as part of a super fun hot chocolate bar setup – perfect for a chilly holiday evening! If you happen to have any leftovers (which I highly doubt!), just pop them into an airtight container at room temperature. They’ll stay wonderfully fresh for about 3-4 days, but I swear, they taste best within the first two!
Frequently Asked Questions about Grinch Cookies
Got questions about our mischievous little Grinch Cookies? I’ve got answers! Baking them is a blast, but it’s good to know a few things to make sure they turn out absolutely perfect. Here are some common queries I get:
Can I make these cookies ahead of time?
Absolutely! The un-decorated cookies can be stored in an airtight container at room temperature for up to 3 days. I usually decorate them the day before I plan to serve them, just to make sure the marker details are super crisp. It’s a great way to get a head start on your holiday baking!
My green dough isn’t very bright. What can I do?
This usually happens because the dough is absorbing the food coloring! For a really vibrant Grinch green, I highly recommend using gel food coloring instead of liquid. A little bit of gel goes a long way, and it won’t add extra moisture that could make your dough too sticky. You might need to add a bit more gel than you think, mixing it in well until you get that perfect Grinchy shade!
What if I don’t have red candy melts?
No worries at all! If you can’t find red candy melts, you have a couple of other cute options for the Grinch’s hat. You could use a small dollop of red-tinted royal icing, or even a bit of strawberry jam if you want a fruity twist. For the best look, apply it while the cookie is already baked and cooled!
How do I get the Grinch’s eyes and mouth to look good?
The key here is a good edible black marker and a completely cooled cookie! Take your time and draw simple shapes. For the eyes, two little ovals work great. For the mouth, a little curve is all you need. Don’t stress about perfection; those adorable, slightly wonky details are part of the fun and charm of these Grinch cookies! You can always add a tiny dot of white edible marker or frosting for the pupil to really make them pop. It’s a fun little touch that reminds me of all the special Christmas morning traditions!
Can I freeze the Grinch Cookies?
You can freeze the undecorated, baked cookies! Once they’re completely cool, wrap them well in plastic wrap and then place them in an airtight container or freezer bag. They’ll keep for about a month. When you’re ready to decorate, just let them thaw completely at room temperature before using your edible marker. It’s a great way to have Whoville-worthy treats ready whenever the mood strikes!
Estimated Nutritional Information
Just a heads-up, the numbers below are estimates for one of our fun Grinch Cookies. They can change a bit depending on the brands of ingredients you use and exactly how big you make them, but it gives you a general idea!
- Serving Size: 1 cookie
- Calories: Around 150
- Fat: About 8g
- Carbohydrates: Roughly 18g
- Protein: Around 2g
This info is just a guide, not a strict rule!
Print
Grinch Cookies
- Total Time: 35 min
- Yield: 3 dozen
- Diet: Vegetarian
Description
Festive and fun Grinch-shaped cookies perfect for the holidays.
Ingredients
- 2 1/4 cups all-purpose flour
- 1 teaspoon baking soda
- 1/2 teaspoon salt
- 1 cup (2 sticks) unsalted butter, softened
- 3/4 cup granulated sugar
- 3/4 cup packed light brown sugar
- 2 large eggs
- 1 teaspoon vanilla extract
- 1/4 cup milk
- Green food coloring
- Red candy melts
- Black edible marker
Instructions
- In a medium bowl, whisk together flour, baking soda, and salt.
- In a large bowl, cream together butter, granulated sugar, and brown sugar until light and fluffy.
- Beat in eggs one at a time, then stir in vanilla extract.
- Gradually add the dry ingredients to the wet ingredients, alternating with the milk, beginning and ending with dry ingredients. Mix until just combined.
- Divide dough in half. Tint one half with green food coloring.
- Shape the green dough into small balls. Flatten slightly.
- Press a small amount of red candy melts onto one side of each green cookie to resemble the Grinch’s hat.
- Bake at 375°F (190°C) for 8-10 minutes, or until edges are lightly golden. Let cool on baking sheets for a few minutes before transferring to wire racks to cool completely.
- Once cool, use a black edible marker to draw eyes and a mouth on the green part of the cookie.
Notes
- For a stronger Grinch look, you can add a small dollop of white frosting for the Grinch’s eyes before drawing on the pupils.
- Ensure candy melts are fully cooled and hardened before drawing on the details.
- Prep Time: 25 min
- Cook Time: 10 min
- Category: Dessert
- Method: Baking
- Cuisine: American